Contenido
Los modelos 3D se pueden encontrar en cualquier lugar. Desde modelos de figuras hasta moldes dentales, desde pequeños juguetes hasta maquetas de coches, desde piezas de repuesto hasta edificios, todo se puede crear mediante el modelado 3D. El modelado 3D está estrechamente relacionado con nuestras vidas. Quizás te preguntes cómo podemos lograrlo. ¿Es difícil para nosotros? En este artículo, presentaremos dos tipos principales de modelado 3D y te enseñaremos a crear modelos 3D paso a paso.
Paso 1: Busque un archivo de modelo 3D
El modelado 3D es el paso fundamental. Existen tres enfoques para lograrlo. Puede elegir el método que mejor se adapte a sus necesidades y conveniencia.
Plan A: Descargar desde plataformas de código abierto
Puedes encontrar muchos archivos de modelos 3D en plataformas de intercambio de código abierto como Thingiverse, Cults3D, Sketchfab, Free3D, TurboSquid y Thangs. Muchos modelos están disponibles gratuitamente y los usuarios suelen ser muy serviciales. Por ejemplo, en Thingiverse, los usuarios suelen subir numerosas imágenes de sus modelos y compartir sus experiencias de impresión. Incluso puedes encontrar instrucciones fáciles de seguir. Como dice el refrán, «Los antepasados plantaron árboles para que las generaciones futuras disfrutaran de la sombra».

Plan B: Crea el tuyo propio usando un software de modelado 3D
Si desea crear un modelo personalizado que aún no existe, puede usar software de modelado 3D para manipular aristas, vértices y polígonos y desarrollar una representación matemática de la superficie del objeto. Este método permite a los diseñadores mejorar la precisión y realizar modificaciones y pruebas rentables. El software de modelado 3D se utiliza en diversos campos, como los videojuegos, el entretenimiento, la arquitectura, la fabricación, el sector editorial, la geología, la ciencia y la industria médica. Sin embargo, puede ser un desafío para principiantes, ya que suele estar dirigido a usuarios experimentados. El software recomendado incluye Maya, 3ds Max, ZBrush, CAD gratuito, 3DCoat, Blender, Fusion 360, Cinema 4D, etc.

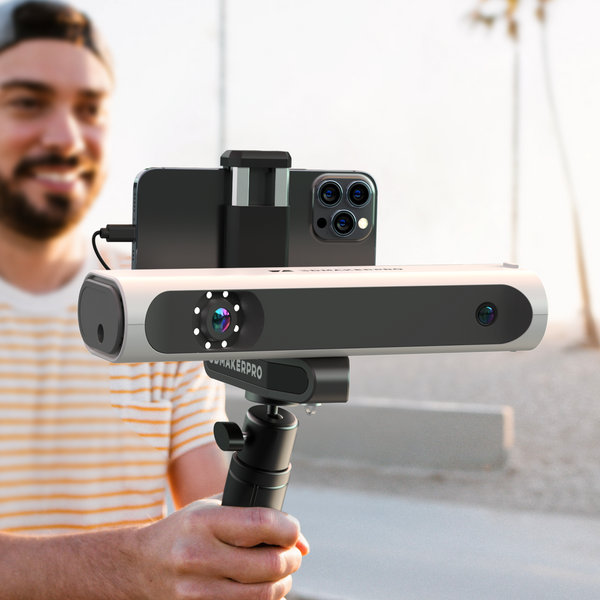
Plan C: Utilizar el escaneo 3D
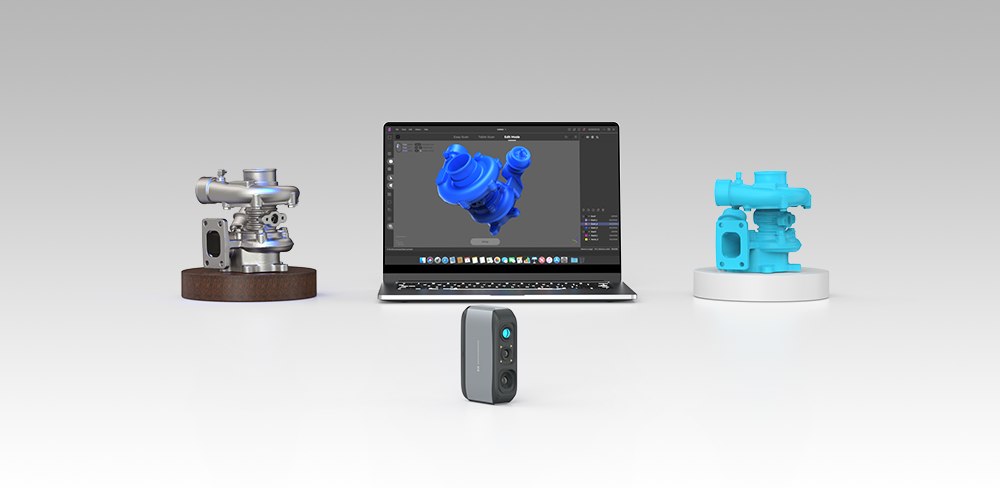
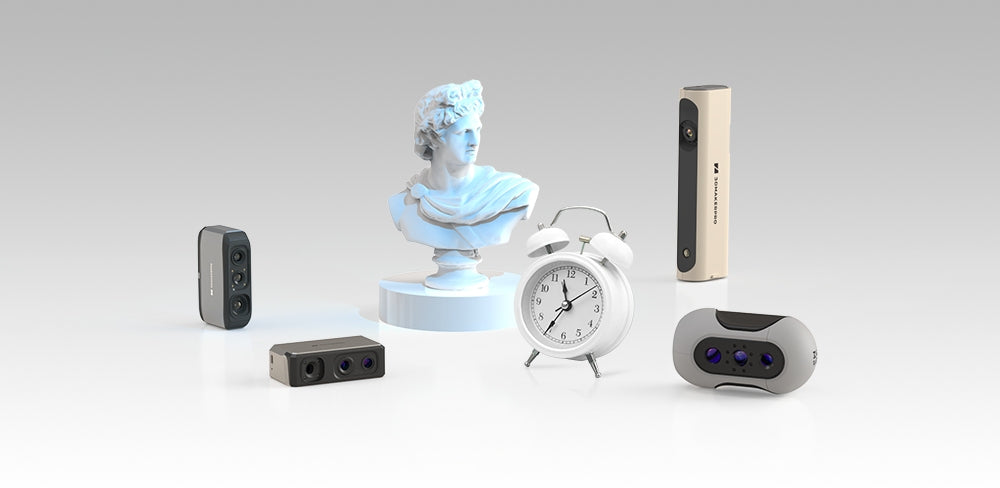
Para un enfoque más sencillo, considere usar el escaneo 3D. Este método emplea tecnología de luz azul para capturar la forma, el tamaño y la textura de la superficie de un objeto sin contacto, generando un modelo digital en su computadora o teléfono. Simplemente sostenga el escáner y capture todos los ángulos del objeto; se mostrará un modelo 3D digital en el software de escaneo. El escaneo 3D es una opción rápida y fácil de usar, especialmente para principiantes.
Sin embargo, se limita al escaneo de modelos existentes, con solo pequeños ajustes posteriores. Esta técnica es aplicable en diversos campos, como el entretenimiento, la arquitectura, la restauración de reliquias culturales, la industria manufacturera, el sector editorial, la protección del patrimonio, la investigación forense y la atención médica. Recomendar Moose escáner 3D, Lynx escáner 3D, Seal escáner 3D, Mole escáner 3D y Estudio JM software de escaneo.

Una vez que complete el proceso de escaneo, asegúrese de guardar su trabajo en formatos de archivo comunes como OBJ, FBX, STL, AMF, IGES, y otros.
Paso 2 Exportar un archivo de corte
Tras completar el proceso de modelado 3D, es hora de pasar al corte. Existen numerosas opciones de software de corte, tanto gratuitas como de pago. Algunas son de código abierto, mientras que otras vienen incluidas con las impresoras 3D. En este paso, deberá configurar los ajustes de la impresora, como la velocidad de impresión, la temperatura de la cama caliente, el grosor de la capa y las estructuras de soporte, para garantizar resultados de impresión óptimos. Muchas impresoras 3D tienen parámetros recomendados, por lo que seguir sus sugerencias puede simplificar el proceso.
Una vez que haya terminado sus configuraciones, exporte el archivo del modelo en formato .gcode. El software de segmentación recomendado incluye UltiMaker Cura, Bambu Studio, Creality Slicer, Simplify3D, Slic3r, PrusaSlicer, OctoPrint, AstroPrint, Tinkercad y Craftware.

Paso 3 Iniciar la impresión
El paso más crucial para dar vida a tu diseño es la impresión 3D. Transfiere tu archivo de código G a tu impresora 3D mediante transmisión USB o LAN. Existen varios tipos de impresoras 3D, como la estereolitografía (SLA), la sinterización selectiva por láser (SLS), el modelado por deposición fundida (FDM), el procesamiento digital de la luz (DLP), la pantalla de cristal líquido (LCD), la fusión por chorro múltiple (MJF), la sinterización directa de metal por láser (DMLS) y la fusión por haz de electrones (EBM). En este ejemplo, nos centraremos en la impresora FDM, ideal para principiantes.
Antes de enviar el archivo de corte a la impresora, asegúrese de que la plataforma de impresión esté nivelada. Los factores clave que debe verificar incluyen la distancia del eje Z, la temperatura de la cama caliente y la velocidad de impresión. Es posible que deba ajustar estos ajustes varias veces para obtener los mejores resultados. Afortunadamente, algunas impresoras ofrecen una prueba de primera capa para ayudar a identificar cualquier problema de configuración. Si surgen problemas, resuélvalos y reinicie el proceso. Una vez que presione el botón de impresión, solo tiene que esperar. También puedes instalar una cámara para supervisar tu proyecto mientras se imprime, lo que puede tardar varias horas o incluso un par de días, dependiendo del tamaño de tu modelo. Las impresoras 3D recomendadas incluyen Creality Ender-3 V3 SE, Creality K1 Max, Bambu X1, Anycubic Photon Mono X2 y la impresora 3D BIQU Hurakan, etc.

Paso 4 Posprocesamiento
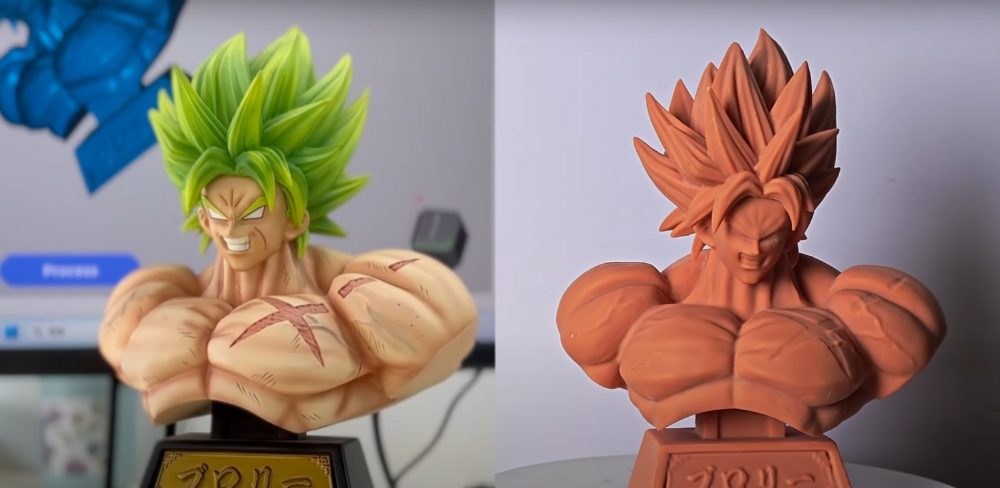
Una vez que la impresión esté completa, con cuidado eliminar cualquier exceso de soporte o material añadido durante el corte. A continuación, lavar o curar tu modelo para mejorar su estabilidad. Para modificaciones precisas, puedes usar un tallado Cuchillo. Después, pule la superficie para asegurar una mejor adherencia de la pintura.
Elige tu favorito pintar—Disponible en formato líquido y en aerosol— ¡Toma tu pincel y empieza a crear! Recuerda: la práctica hace al maestro, así que siéntete libre de experimentar y perfeccionar tu obra. ¡Felicidades por darle vida a tu modelo 3D!

Revisión y resumen
Crear un modelo 3D no es tan difícil como parece; el interés es el mejor maestro. escáneres 3D Son compañeros invaluables en el proceso de impresión 3D. Para obtener consejos más detallados sobre la creación de modelos 3D, siga nuestro blog. Avancemos juntos. 3DMaker Pro A tu lado en este viaje creativo.
Agradecemos sinceramente los comentarios de nuestros seguidores sobre este pasaje o nuestros productos. No dude en sugerir temas de discusión interesantes o compartir sus perspectivas sobre la industria 3D. ¡Tómese un momento para conectar y todos nos beneficiaremos del intercambio!

Colección destacada
Medium-format


Large-format
Medium-format


