Vi siete mai chiesti quanto tempo richiede una scansione 3D? A volte bastano pochi minuti, mentre altre volte possono volerci diverse ore o addirittura un giorno intero per scansionare un oggetto. Il tempo di scansione dipende da diversi fattori, tra cui le dimensioni dell'oggetto, i requisiti di accuratezza e risoluzione e le esigenze di post-elaborazione. Analizziamo questi fattori in dettaglio.
1.Dimensioni dell'oggetto
Uno dei fattori più significativi che influenzano la velocità di scansione è la dimensione dell'oggetto. La scansione di oggetti piccoli è generalmente più veloce rispetto a quella di oggetti grandi, poiché gli scanner hanno un raggio di scansione limitato. Se il modello supera le specifiche dello scanner, potrebbe essere necessario eseguire la scansione da più angolazioni più volte, il che può prolungare il tempo complessivo richiesto.
Inoltre, scansionare ripetutamente gli stessi elementi di collegamento in progetti diversi può essere utile per l'allineamento e la fusione successivi. Per modelli più grandi, è essenziale prestare attenzione al raggio di scansione e alla distanza di lavoro, poiché la perdita di tracciamento può diventare un problema. Prendetevi il tempo necessario e date priorità alla qualità rispetto alla velocità; affrettarsi può portare a scansioni approssimative che potrebbero richiedere ulteriori riprese, con conseguente ulteriore perdita di tempo.
Per riferimento, scansiona un piccolo maiale (3,6 cm x 6 cm x 3,7 cm) richiede circa 3 minuti Al contrario, la scansione di un veicolo di grandi dimensioni (490,8 cm x 186,2 cm x 144.9 centimetri) ci vogliono circa 3 ore.

2. Requisiti di accuratezza e risoluzione
Quando si lavora con modelli caratterizzati da colori vivaci e motivi intricati, è essenziale dedicare tempo e impegno aggiuntivi per ricrearli accuratamente. Se la cattura della texture non è chiara, potrebbe essere necessario un processo di scansione più lento. La scansione di un oggetto con texture potrebbe richiedere quasi il doppio del tempo rispetto a quella di uno liscio.
Con prova pratica, la scansione di un vaso liscio di una certa dimensione prende 1 minuto e 37 secondi, durante la scansione un vaso adornato di colore e consistenza prende 2 minuti e 36 secondiÈ dimostrato che sia l'accuratezza sia la risoluzione influiscono direttamente sulla velocità di scansione: maggiore è la precisione richiesta, maggiore sarà il tempo da dedicare.
3.Post-vendita: JM Studio Software
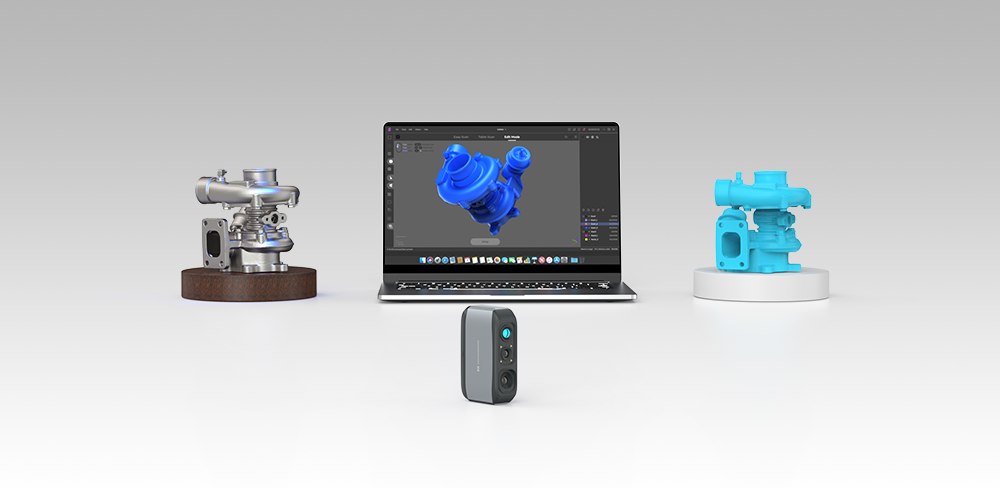
Il passaggio più critico successivo alla scansione è la fase di elaborazione software, che è parte integrante del flusso di lavoro di scansione 3D. Questa fase richiederà da diversi minuti a diverse ore, a seconda del volume di dati di scansione. Il processo di editing in genere include:
a) Allinea: Utilizza l'allineamento automatico o manuale. I modelli complessi spesso richiedono l'allineamento manuale per una maggiore precisione.
b) Rimozione del rumore statistico: Pulisci i punti isolati nel cloud.
c) Fusione: Crea una mesh dei dati della nuvola di punti collegando i punti per produrre un modello completo. Questo passaggio è obbligatorio in quanto combina tutti gli elementi scansionati in un oggetto unificato.
d) Rimuovere le parti galleggianti: Pulisci la mesh rimuovendo i rumori fluttuanti dalle scansioni. È un'opzione obbligatoria.
e) Riparare le lacune: Riempi i fori sulla rete per ottenere un modello a tenuta stagna. Sceglilo con cura, soprattutto se hai un pezzo cavo. Per risolvere i vuoti ai bordi dell'oggetto scansionato, puoi utilizzare Geomagic Wrap per 3DMakerpro software con la funzionalità Mesh Doctor.
f) Semplificare: Ridurre il numero di facce della mesh per ridurre le dimensioni dei dati. Questo è generalmente consigliabile in quanto può ridurre al minimo il volume dei dati scansionati e aumentare la velocità di elaborazione.
g) Mappatura delle texture: Applica le informazioni sulla texture o sul colore alla superficie della mesh. Nota che le opzioni di colore sono disponibili solo con alcuni 3DMakerpro scanner. Utilizza questa funzione se desideri salvare un file immagine aggiuntivo da visualizzare.
Sebbene queste procedure non siano eccessivamente complicate, possono richiedere molto tempo, soprattutto quando si tratta di oggetti complessi. Ad esempio, l'elaborazione di un piccolo modello di maiale. (3,6 cm x 6 cm x 3,7 cm) potrebbe richiedere circa 8 minuti, mentre un modello di veicolo di grandi dimensioni (490,8 cm x 186,2 cm x 144,9 cm) potrebbe impiegare circa 3 ore.

Confronta i nostri quattro scanner
Per darvi un'idea più precisa dei tempi di scansione, confronteremo il tempo impiegato da quattro scanner per scansionare un oggetto. Vediamo come si comportano!
Oggetto 1: Cervo

Moose Scanner: 2 minuti e 36 secondi per la scansione; 4 minuti e 30 secondi per l'elaborazione; totale: 7 minuti e 6 secondiI risultati della scansione sono molto buoni.
Lynx Scanner: 1 minuto e 37 secondi per la scansione; 3 minuti e 16 secondi per l'elaborazione; totale: 4 minuti e 54 secondiI risultati della scansione sono molto completi.
Seal Scanner: 7 minuti e 8 secondi per la scansione, 8 minuti e 54 secondi per l'elaborazione; totale: 16 minuti e 2 secondiLe scansioni sono molto dettagliate, ma le parti cave possono causare problemi di tracciamento. Seal Lo scanner è più adatto per spazzare oggetti piccoli e delicati.

Mole Scanner: 2 minuti e 11 secondi per la scansione, 5 minuti e 12 secondi per l'elaborazione; totale: 7 minuti e 24 secondiLa scansione è relativamente veloce, ma è necessario fare attenzione a evitare disallineamenti.
Oggetto 2: Vaso

Moose Scanner: 5 minuti e 40 secondi per la scansione e 8 minuti e 8 secondi per l'elaborazione; totale: 13 minuti e 49 secondiI dettagli sono ben riprodotti e catturati a colori.
Lynx Scanner: 1 minuto e 49 secondi per la scansione, 2 minuti e 54 secondi per l'elaborazione; totale: 4 minuti e 44 secondiOffre un'ampia gamma di scansione e un'elevata velocità di acquisizione delle immagini. Lynx è adatto per spazzare oggetti di grandi dimensioni, come le automobili.
Seal Scanner: 10 minuti e 37 secondi per la scansione, 11 minuti e 54 secondi per l'elaborazione; totale: 22 minuti e 31 secondiElevata riproduzione dei colori, ma scansione più lenta.
Mole Scanner: 5 minuti e 6 secondi per la scansione, 4 minuti e 47 secondi per l'elaborazione; totale: 9 minuti e 54 secondiL'acquisizione delle immagini è più rapida, ma potrebbero essere necessarie più scansioni per ottenere un risultato completo.
Da questa valutazione vediamo che l Lynx Lo scanner offre i tempi di scansione più rapidi, mentre Moose E Seal Gli scanner forniscono la massima precisione. Lynx E Mole Gli scanner sono più adatti per oggetti più grandi, mentre gli Moose E Seal Gli scanner eccellono con gli oggetti più piccoli. Mole Lo scanner mantiene prestazioni stabili con oggetti di diverse dimensioni. Abbiamo effettuato numerose prove durante la scansione, poiché non tutti gli scanner sono adatti a tutti i modelli e alcuni potrebbero non riuscire a rilevare oggetti neri o rossi lucidi; alcuni scanner sono adatti alla scansione di oggetti di piccole dimensioni, mentre altri offrono buone prestazioni con oggetti di grandi dimensioni. Pertanto, è necessario scegliere uno scanner adatto a ciascun programma.
In una parola
La scansione 3D può essere un processo piacevole, ma richiede pazienza. Scegliere lo scanner più adatto ai vostri modelli può farvi risparmiare una notevole quantità di tempo. Inoltre, l'esperienza individuale e la familiarità con le attrezzature possono comportare tempi di scansione variabili, quindi considerate questo passaggio come un riferimento piuttosto che come un'autorità. Ci auguriamo che troviate uno scanner adatto alle vostre esigenze e preferenze. 3DMakerpro!


