Contenuto
Gli scanner 3D desktop e gli scanner 3D portatili offrono ciascuno vantaggi e svantaggi distinti, consentendoti di scegliere l'opzione migliore in base alle tue esigenze specifiche. In particolare, 3DMakerpro offre entrambe le tipologie, offrendo la flessibilità di godere dei vantaggi delle funzionalità sia desktop che palmari.
Scanner 3D da tavolo
Gli scanner 3D desktop sono progettati con un ampio raggio di scansione, il che li rende ideali per catturare facilmente oggetti di grandi dimensioni. In genere offrono elevata precisione e immagini vivide, garantendo la conservazione di dettagli complessi nelle scansioni. Un vantaggio significativo è che molti modelli desktop possono funzionare durante la ricarica, consentendo sessioni di scansione ininterrotte senza preoccuparsi di limitazioni di potenza. Il processo di scansione è generalmente intuitivo, spesso dotato di software intuitivo che semplifica l'elaborazione dei dati e migliora l'esperienza utente complessiva. Tuttavia, uno svantaggio notevole è il loro ingombro: questi scanner possono essere pesanti e richiedere uno spazio di lavoro dedicato, il che potrebbe non essere fattibile per tutti.

Scanner 3D portatili
D'altro canto, gli scanner 3D portatili sono compatti e leggeri, progettati per un facile trasporto e utilizzo in diversi contesti. Sono eccellenti nella scansione di oggetti di piccole dimensioni o nell'acquisizione di dati su brevi distanze, offrendo un livello di versatilità che li rende adatti per lavori sul campo, mostre e valutazioni in loco. Molti modelli portatili sono alimentati a batterie, alcune delle quali durano fino a quattro ore, consentendo di eseguire scansioni senza essere collegati a una fonte di alimentazione. Sebbene gli scanner portatili non raggiungano lo stesso livello di precisione degli scanner desktop, offrono notevole praticità e accessibilità. Tuttavia, gli utenti devono importare i dati di scansione in un computer per l'elaborazione, il che può introdurre un passaggio aggiuntivo nel flusso di lavoro.
In definitiva, la scelta tra uno scanner 3D desktop e uno portatile dipenderà dalle vostre esigenze specifiche, che si tratti di precisione e dettaglio o di flessibilità per la scansione in diverse posizioni. Comprendere i vantaggi unici di ciascuna tipologia vi aiuterà a prendere una decisione consapevole, che si adatti al meglio alle vostre esigenze di scansione 3D.

Ecco alcuni scanner 3D desktop:
1.3DMakerpro: Moose Scanner 3D, Seal Scanner 3D (Compatibile con giradischi multiasse)
2.Einstar: Scanner 3D da tavolo EinScan-SE V2, scanner 3D da tavolo EinScan-SP V2
3. Creality: RaptorX, Furetto
4.Artec3d: Artec Micro II,
5. Brillante 3D: Scanner 3D EinScan SP V2, EinScan-SE V2
(Nota: Il Seal Lo scanner 3D può essere utilizzato direttamente con il giradischi multiasse. Al contrario, il Moose (Richiede componenti fai da te aggiuntivi per estendere la distanza di scansione, poiché è progettato con una distanza di lavoro maggiore.)
Ecco alcuni scanner 3D desktop:
1.3DMakerpro: Moose scanner 3D, Seal scanner 3D, Mole scanner 3D, Lynx scanner 3D
2.Einstar: Scanner 3D portatile EINSTAR Prosumer
3. Creality: scansione CR Lizard scanner 3D
4.Artec3d: Artec Leo, Artec Spider II
5. Brillante 3D: EinScan HX2, EinScan HX, EinScan H2
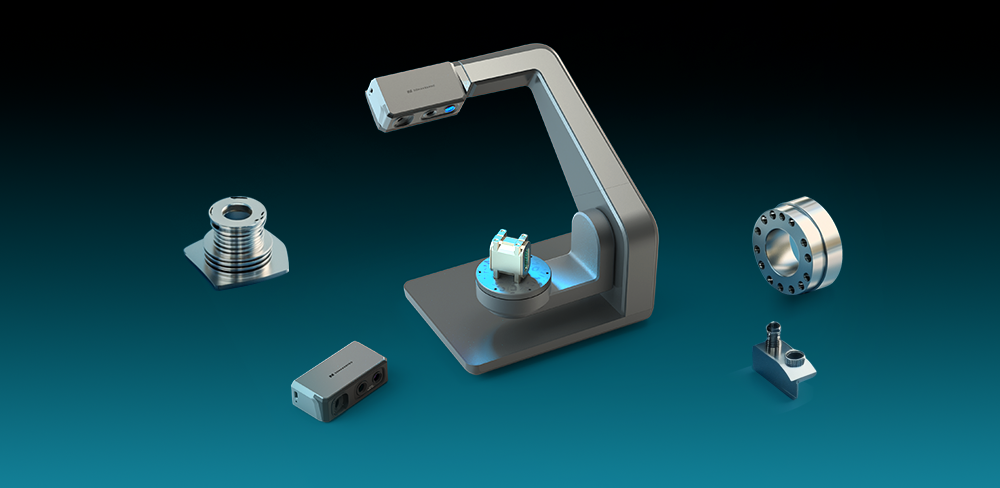
Esploriamo il Seal Scanner + Giradischi multiasse e scopri le capacità di scansione di uno scanner da tavolo.
Quando si scansionano oggetti metallici, è essenziale applicare uno spray per la scansione per ottenere immagini ottimali. Spruzzare uniformemente sugli oggetti; questo spray è progettato per evaporare da solo e non richiede risciacquo. Se il processo di scansione richiede troppo tempo, potrebbe essere necessario riapplicare lo spray. Assicurarsi di spruzzare in un angolo ed evitare il contatto diretto con le persone, poiché l'odore può essere leggermente pungente.

Successivamente, fissa il blocco metallico al piatto girevole. Per ottenere una scansione completa, inizia scansionando il lato anteriore, quindi gira l'oggetto per scansionare il lato posteriore. Ora imposteremo gli angoli di scansione.
Apri il Corso personalizzato 1 e inserisci i seguenti parametri:
① -30° 0°-180°
②0° 0°-180°
30° 0°-180°
Dopo aver inserito questi angoli, fare clic sul pulsante "Scansione". Il sistema si adatterà automaticamente agli angoli specificati; attendere solo qualche minuto. Per immagini più dettagliate, è possibile fare clic sul pulsante "Aggiungi" per aggiungere 2-3 progetti. Una volta terminato, rimuovere eventuali rumori o parti non necessarie dalle scansioni. Selezionare tre set di dati di scansione per l'allineamento automatico e fare clic su "OK".
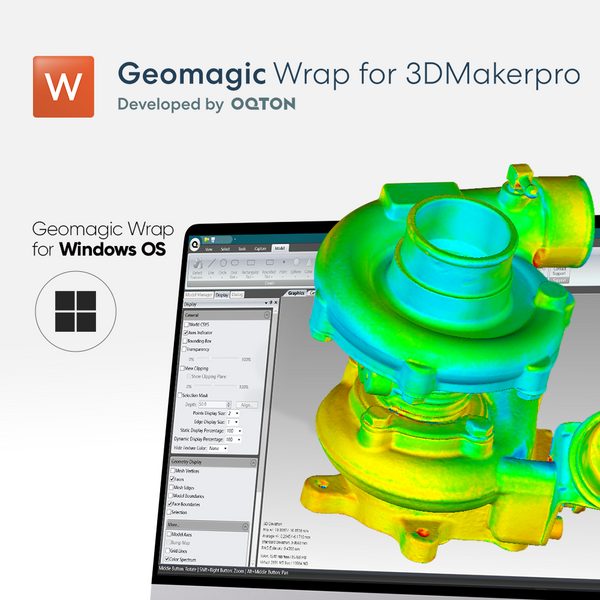
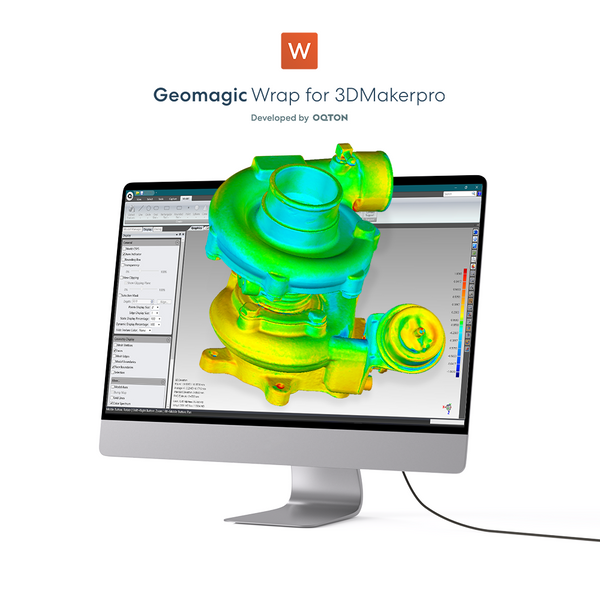
Successivamente, seleziona le seguenti opzioni: Rimozione del rumore statistico, Fusione, Rimuovi parti fluttuanti, Semplifica, Denoising della mesh e Texture Mapping. Dopo qualche altro minuto, riceverai un modello preciso. Piccoli difetti o lacune possono essere corretti utilizzando un software di editing del modello, come Geomagic Wrap per 3DMakerpro.
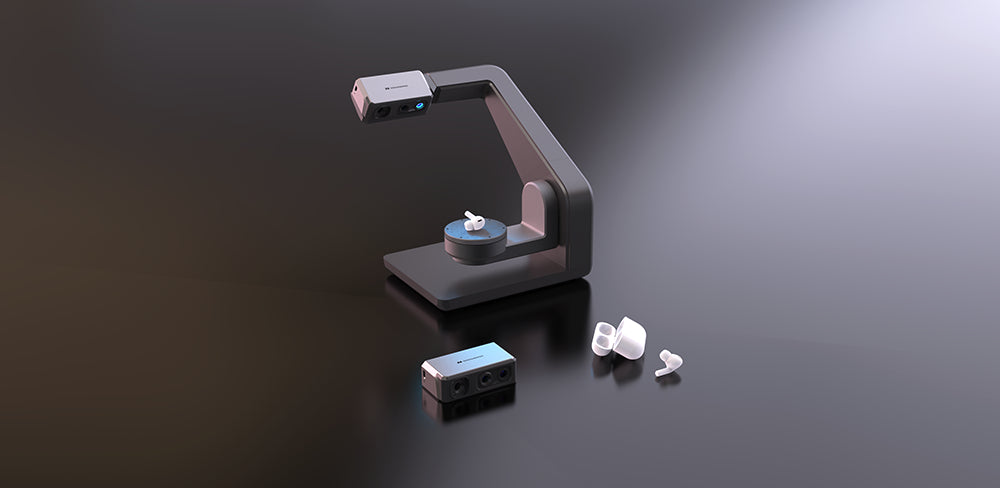
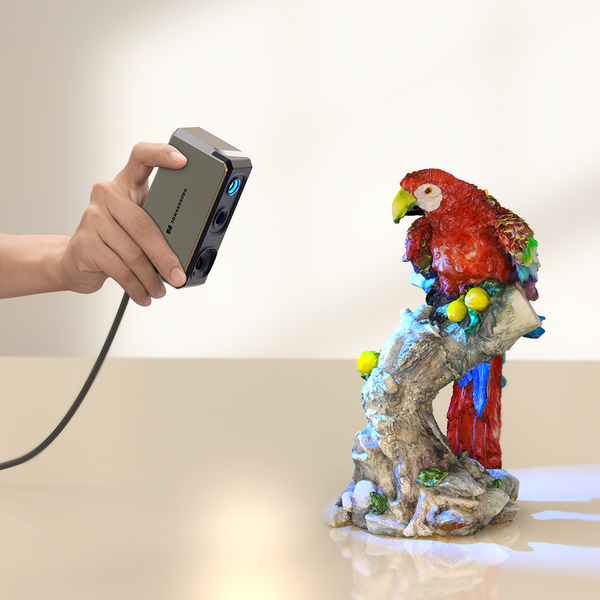
Successivamente, esaminiamo il Seal scanner in combinazione con il piatto girevole automatico per valutare le prestazioni dello scanner portatile.
Prima della scansione, assicurarsi che le parti metalliche siano spruzzate con lo spray AESUB per ottenere un'intensità di colore ottimale.
Posizionare l'elemento al centro del giradischi, avviare la rotazione automatica e fare clic sul pulsante "Scansione" per iniziare la scansione con il Seal Scanner. Si prega di notare che il Seal Lo scanner vanta un'incredibile precisione di 0,01 mm e opera a una distanza di lavoro di 180-280 mm. È fondamentale monitorare costantemente l'indicatore di distanza a sinistra per mantenere lo scanner nella posizione ottimale per acquisire immagini nitide ed evitare perdite di tracciamento. Dopo aver scansionato il lato anteriore, è sufficiente capovolgere l'oggetto per scansionare il lato posteriore.
Una volta scansionati entrambi i lati, rimuovi il rumore in eccesso e allinea automaticamente le due immagini. Quindi, seleziona le seguenti opzioni: Rimozione rumore statistico, Fusione, Rimuovi parti fluttuanti, Semplifica, Denoising mesh e Mappatura texture. Questo processo produrrà un modello rifinito. Se desideri apportare ulteriori modifiche, puoi utilizzare Geomagic Wrap o 3DMakerpro software.
Questo è tutto! Il 3DMakerpro Seal Lo scanner 3D supporta sia la scansione desktop che quella portatile, offrendo un valore eccezionale per il tuo investimento. Sfrutta appieno il suo potenziale oggi stesso! Speriamo di vederti nel nostro prossimo articolo. Se ci sono argomenti che vorresti che trattassimo, lascia un commento qui sotto. Non vediamo l'ora di sentirti!
Collezione in primo piano
Small-format
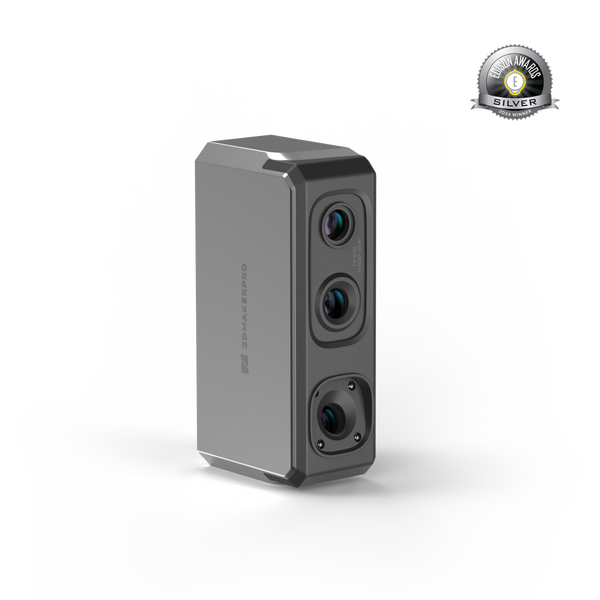
Seal Scanner 3D


AESUB Blue Scanning Spray 400 ml
CADOqton


