Content

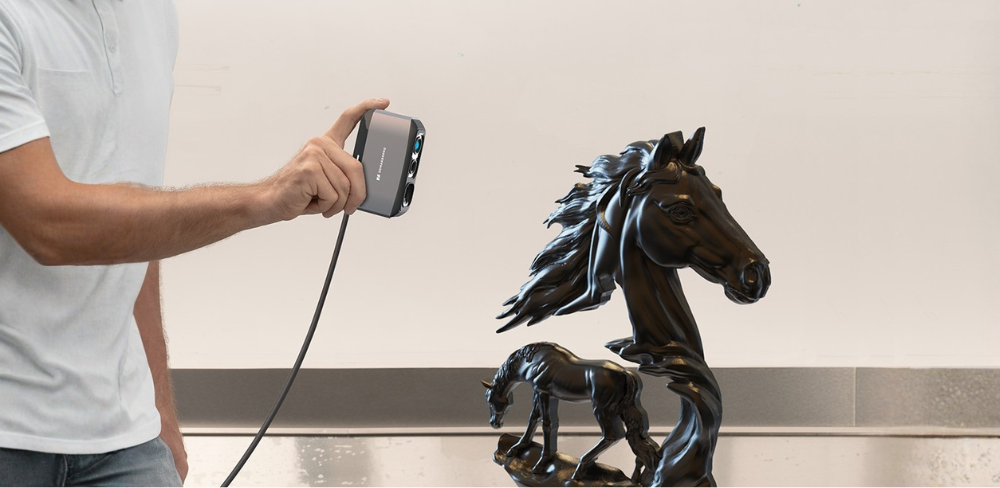
What can a compact handheld 3D scanner really accomplish in a single day? This challenge is about real-world scanning with the 3DMakerpro Fox — a portable high-precision, structured light scanner designed for detailed object capture. Over the course of one day, I’ll attempt to scan ten completely different objects.
And one important detail: this was my very first time using the Fox scanner. I wanted to see how it performs under real-world conditions with zero prior experience. To see how the Fox handles various situations, I selected ten objects ranging from very small to larger ones. Color and material were completely unrestricted—matte, reflective, dark, bright, textured, or smooth, everything was fair game.
This article won’t skip the difficult parts. I’ll be documenting the actual scanning experience as it happens, including:
a) Try Times: How many times did I have to retry the scan?
b) Time Spent: Divided into Scanning Time (the actual capture process) and Total Workflow Time (which covers the initial scan and all subsequent software processing, such as merging datasets, removing noise, and generating the final model).
c) Scanning Notes: The specific challenges and my solutions.
d) Takeaway: The key lesson learned from each object.
e) Final processed models picture.
By the end of the challenge, we’ll have ten different models, practical scanning notes, and a much clearer understanding of where the Fox performs best — and where technique matters most.
Object 1: Little Ghost

a) Try Times: 3
b) Time Spent: 49s scanning / Total workflow time not recorded because of incomplete model.
c) Scanning notes:
Challenge①: Fragmented Geometry and Incomplete Capture
Because this was an extremely small model, it was difficult for a medium-format scanner like the Fox to capture fine details at its required scanning distance and fully detect the entire geometry. In the end, I was only able to scan one side rather than generate a complete model.
Solution①: Switching to a Micro-Detail Scanner (such as the 3DMakerpro Seal)
The Fox performs better on medium-sized objects. For very small items with intricate details, a dedicated small-object scanner like the Seal would likely achieve better results.
d) Takeaway:
Each scanner has its own advantages and limitations. We need to choose the right device based on the intended purpose. Every tool has its place.

Object 2: Sitting Ghost

a) Try Times: 3
b) Time Spent: 3m21s scanning / 19m50s total workflow time
c) Scanning notes:
Challenge①: Tracking Lost & Real-Time “Ghosting”
During my first two attempts, I experienced noticeable "ghosting" (misaligned frames) during the live scan. I suspected this was caused by uneven manual rotation of the model, combined with keeping the scanner at inconsistent angles. The software preview window confirmed that the object was sliding off-center during capture, which broke the tracking stability.
Solution①: Utilizing an Automatic Turntable
To ensure smooth, consistent rotation, I swapped my manual setup for an automatic turntable. This kept the model perfectly centered in the scanner's field of view. Instead of trying to awkwardly rotate the object with one hand while holding the scanner with the other, I could focus entirely on monitoring the real-time scan quality on my screen. Using this method, I successfully captured four complete angles: front, back, left, and right.
Challenge②: Alignment Ghosting During the Merge Process
Although the individual scans were clean, merging all four datasets 1234 together in the software caused alignment errors and duplicate "ghost" surfaces.
Solution②: Reducing the Merge Data
I then tested merging datasets 1, 3, and 4, but minor artifacts were still visible. Just as I was about to try manual alignment, I decided to give automatic alignment one last attempt by merging only datasets 3 and 4. Unexpectedly, this produced a clean result with no visible ghosting, and the surface details and textures were beautifully preserved.
Even though datasets 1 and 2 weren't used in the final model, they weren't wasted effort. It was precisely through those early attempts that I realized the side geometry was missing, which prompted me to capture the left and right profiles (datasets 3 and 4) in the first place.
d) Takeaway:
Stable, controlled rotation is vital for structured light scanning. Furthermore, more data is not always better; sometimes, merging fewer, higher-quality datasets yields a cleaner final mesh.

Object 3: House

a) Try Times: 1
b) Time Spent: 2m25s scanning / 9m20s total workflow time
c) Scanning notes:
The first attempt was a complete success. The house model featured distinct geometric shapes, a clear structure, and a highly suitable size for the Fox scanner, making the capture process incredibly straightforward. I then auto-aligned the two scan datasets and ran through the standard processing steps, skipping only the Texture Mapping stage (since the Fox lacks an RGB color module and only captures monochrome textures). Through this simple workflow, I quickly obtained a clean, completed model.
d) Takeaway:
When an object has distinct geometric features and falls within the scanner's optimal size range, both the capture and alignment processes can be remarkably smooth, showing how fast and efficient the workflow can be under ideal conditions.

Object 4: Water Cup

a) Try Times: 2
b) Time Spent: 2m31s scanning / 13m33s total workflow time
c) Scanning Notes:
Challenge ①: Tracking Drift and Ghosting on the Side Profiles
When I first attempted to capture the second angle from the side, the software lost tracking, resulting in noticeable ghosting and misalignments.
Solution ①: Changing the Object's Orientation (Flipping Upside Down)
To fix this, I flipped the cup upside down on the turntable to scan the bottom. This simple shift in perspective provided a much more stable surface for the tracker, allowing me to obtain a near-perfect, ghost-free scan of the bottom and the remaining angles.
Challenge ②: Flat Printed Graphics Disappeared in the Final Model
The scan from the front angle to the top-down angle went smoothly, resulting in a relatively complete 3D preview. However, after final processing, the printed logo/stamp on the front of the cup and the watermark on the bottom completely disappeared.
Solution ②: Understanding 3D Geometry vs. 2D Print (Moose vs. Fox)
This happened because those graphics were flat, smooth prints rather than physical, engraved textures. Since the Fox does not have an RGB color camera module, it captures physical 3D shapes rather than flat 2D colors. If your project requires restoring true-to-life colors and printed details, a full-color 3D scanner like the 3DMakerpro Moose would be the ideal choice. However, if you do not need color, the Fox is still excellent at capturing and recreating physical surface details, such as the bumpy, uneven texture of this cup's body.
d) Takeaway:
When encountering tracking issues on vertical or side profiles during a scan, creatively changing the object's orientation—such as placing it upside down—is an easy and highly effective way to restore stability. Furthermore, it is important to remember that pure structured light sensors capture physical geometry, meaning flat 2D surface prints will naturally be filtered out.

Object 5: Transformers Car

a) Try Times: 1
b) Time Spent: 1m 05s scanning / Total workflow time not recorded because of incomplete model.
c) Scanning Notes:
Challenge ①: Inability to Capture Black Surfaces (Car Windows)
Due to tracking issues, I only managed to scan a single pass around the front of the car, resulting in an incomplete model. While the vibrant red plastic body of the vehicle was captured without any issues, the black window sections completely failed to register. This is because dark black surfaces absorb the scanner's light projection rather than reflecting it back to the sensor, leaving empty holes in the raw data.
Solution ①: Switching to a Scanner Optimized for Dark Surfaces (3DMakerpro Mole)
If your projects frequently involve dark or black materials, the 3DMakerpro Mole is a much more suitable alternative. While it is also a medium-format scanner similar in size to the Fox, the Mole is specifically engineered with enhanced Near-Infrared (NIR) optical compatibility and specialized tracking algorithms, making it highly capable of distinguishing and capturing deep black objects.
d) Takeaway:
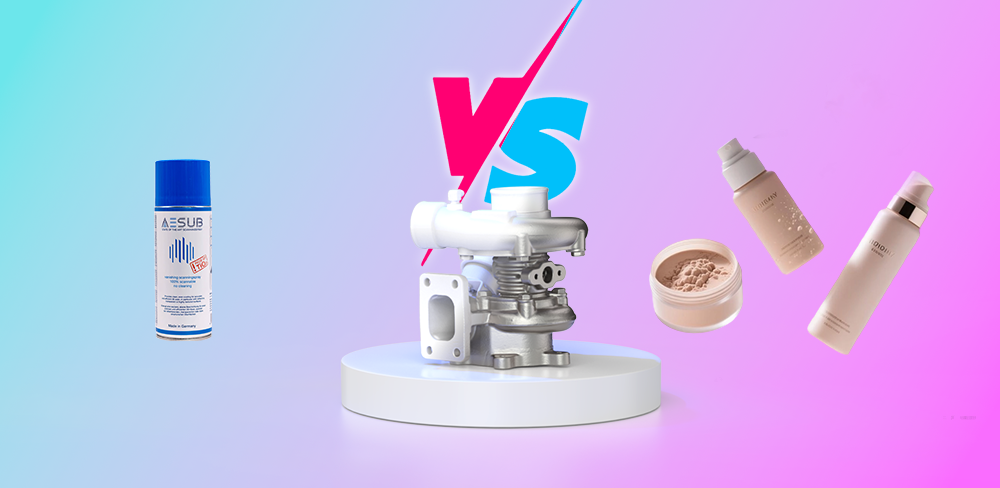
Pure black materials represent a classic hurdle for optical 3D scanners due to light absorption. When scanning multi-colored items that feature dark or black parts, success relies on either using a scanner with superior dark-surface compatibility (like the Mole) or applying a temporary matte scanning spray to help the light bounce back to the sensor.

Object 6: Turbine Casing (Metal Cover)

a) Try Times: 3
b) Time Spent: 5m 25s scanning / 25m 05s total workflow time
c) Scanning Notes:
Challenge ①: Inability to Align Fully Separated Scans
This cast-metal casing is a highly complex component with deep recesses, hollow cavities, and reflective metallic surfaces. During my first attempt, I tried scanning the side and front together, which caused severe real-time ghosting. To fix this, I completely separated the front, side, and back into independent datasets, but because there was not enough overlapping geometry between them, the software failed to align them.
Solution ①: Establishing Overlapping Features
For the subsequent attempts, I realized that some level of shared geometry (overlapping data) is absolutely necessary for the software to register different angles successfully.
Challenge ②: Symmetrical Misalignment and Rough Geometry (Reverse Alignment)
In my second attempt, I grouped the "Front + Side" as Scan Dataset 1, and the "Back" as Scan Dataset 2, and tried an auto-merge. However, because of the symmetrical circular aspects of the casing, the software became confused. The back geometry was erroneously projected onto the front, resulting in a distorted, reverse-aligned, and extremely rough model.
Solution ②: Creating a "Geometric Bridge" (The 3-Step Scan Strategy)
In my third attempt, I adopted a brilliant 3-step scanning strategy to help the software distinguish the front from the back:
1. Scan the front and side with the casing lying flat.
2. Scan the back and side with the casing lying flat.
3. Scan the side profile with the casing standing upright.
This third, upright side-scan acted as a "geometric bridge." It contained shared features from both the front and back scans, allowing the alignment software to perfectly register the spatial relationship between all three datasets. The merge was a flawless success, producing a highly detailed 3D model with crisp, accurate interior structures.
d) Takeaway:
When scanning highly complex, symmetrical objects with deep cavities, scanning them in isolated parts often leads to alignment failure. Success relies on capturing a dedicated "bridging" dataset—such as a vertical profile—to help the software map the front and back geometries together correctly. Ultimately, 3D scanning always comes with a learning curve; patience and a willingness to systematically troubleshoot are just as important as the hardware itself. Sometimes, success is just one adjustment away.

Object 7: Little Boy Bust Sculpture

a) Try Times: 1
b) Time Spent: 4m 57s scanning / 20m 27s total workflow time
c) Scanning Notes:
Challenge ①: Intricate Crevices and Overlapping Textures (Flower Hair)
The matte blue surface of this resin sculpture was highly receptive to the scanner's light, making tracking incredibly stable. However, the boy's "hair"—composed of highly complex, layered flower petals—presented a minor challenge. The overlapping petals created numerous deep crevices and tight angles that could easily result in missing data if scanned too quickly.
Solution ①: Multi-Angle Scanning (Front, Left-Lying, and Right-Lying)
To capture every hidden pocket within the flowers and fully close the bottom base, I carefully scan from three distinct orientations:
1. Front + Top-down (to capture the facial expressions and the top of the floral crown).
2. Lying down on its left side.
3. Lying down on its right side.
Because the tracking remained highly stable throughout, the software easily aligned these three datasets on the first try. The final model captured the delicate contours of the petals with high fidelity.
d) Takeaway:
Even when an object's material is highly cooperative, complex geometry with deep, overlapping details still demands extra scanning time and creative positioning. Lying the object on its side is often the best way to ensure the scanner's line of sight can reach into deep undercuts and capture the flat underside of a base.

Object 8: 3D-Printed Durian

a) Try Times: 2
b) Time Spent: 48s scanning / Total workflow time not recorded (incomplete model)
c) Scanning Notes:
Challenge ①: Severe Surface Glare and Lost Tracking on Silk Filament
This durian model was printed using a highly reflective, dual-color "silk" PLA filament that shimmers intensely under light. Combined with the hundreds of sharp, multi-angled spikes, the glossy surface scattered the scanner's light in every direction. This caused immediate optical glare and overexposure, leading to constant tracking loss and ultimately leaving the scan incomplete.
Solution ①: Applying Matte Scanning Spray
Despite the tracking issues, the small patches that were successfully captured within those 48 seconds showed impressive detail on the spikes. However, to complete a scan of this nature, a pre-treatment is necessary. Applying a light, temporary coat of matte scanning spray (which naturally sublimates/evaporates after use) is the only way to eliminate the specular glare and keep the scanner's tracking locked on the shiny surface.
d) Takeaway:
Silky, glossy, or metallic-finish 3D printing filaments are notoriously difficult for optical 3D scanners to track because they bounce light unpredictably. When dealing with high-gloss materials, using a temporary matte scanning spray is a standard industry preparation step.
On a side note, scanning a durian is a highly unique and novel idea! If you want to try this yourself, using a real durian would likely yield much better and easier results. Natural, organic skins are matte and diffuse light perfectly, making them highly cooperative subjects for a structured light scanner.

Object 9: Crackle-Glaze Ceramic Vase

a) Try Times: 2
b) Time Spent: 5m 47s scanning / 36m 05s total workflow time
c) Scanning Notes:
Challenge ①: The "No Color = No Texture" Misconception
Because the Fox lacks an RGB color camera module, I previously assumed it could only output blank, smooth grey meshes. I didn't think it was capable of capturing any of the vase's intricate painted patterns or fine crackle glaze lines.
Solution ①: Accidentally Discovering the Power of Monochrome Textures
During the post-processing of my second attempt, I accidentally ticked the Texture Mapping box. To my absolute surprise, the software generated a highly detailed monochrome texture directly onto the 3D model! This unexpected discovery solved the mystery of the Water Cup (Object 4)—if I had enabled this option back then, the smooth printed logo on the cup would have actually shown up clearly in high-contrast black and white, instead of disappearing.
Many beginners confuse “no color” with “no texture.” While a physical 3D print won't have these patterns, the digital 3D scan provides a vivid, 1:1 visual replica. The final result is so lifelike that it almost makes you forget it lacks color entirely; every hairline crackle and blue floral curve are captured beautifully, giving the model a poetic, classic ink-painting aesthetic.
Challenge ②: Slippery Surface and Turntable Displacement
During my first try, scanning the vase's side profile was difficult because the glazed ceramic surface was highly slippery and the automatic turntable rotated slightly too quickly, causing the vase to slide and lose tracking alignment.
Solution ②: Flipping Upside Down and a 3-Angle Strategy
To prevent slipping, I flipped the vase upside down. I successfully captured three distinct angles:
1.Right-side up (capturing the front body and the top rim).
2.Upside down (capturing the base and underside).
3.A close-up, dedicated scan focusing specifically on the inside and outside of the rim (the neck).
Safety Note: When scanning delicate glass or ceramic objects, always handle them with care to avoid damage when changing their orientation.
Challenge ③: Auto-Alignment Failure for the Three Datasets
During the merging stage, the software's automatic alignment failed to register the three separate datasets.
Solution ③: Manual 3-Point Alignment and Progressive Merging
Fortunately, I had learned from my previous failures and proactively scanned plenty of overlapping features (common points) between the sweeps. I manually aligned Dataset 1 and Dataset 2 by placing three marker points on matching features, which successfully fused them. I then let the software auto-align this combined dataset with Dataset 3. This progressive merge worked beautifully.
Post-Processing Settings Tip:
When processing, I checked all options except Repair Gaps. Because the vase is a hollow vessel with an open neck, checking "Repair Gaps" would treat the open mouth as a hole and seal it completely shut. To keep the vase hollow, leave "Repair Gaps" unchecked, keep everything else enabled, and make sure to turn on Texture Mapping!
d) Takeaway:
Monochrome texture mapping is incredibly powerful; do not skip it just because your scanner lacks RGB color, as it brings intricate surface patterns like cracked glaze to life in digital space. Furthermore, always uncheck gap-repair/hole-filling features when scanning hollow containers with natural openings, and proactively scan overlapping geometry so you can rely on manual 3-point alignment if auto-alignment fails.

Object 10: Auspicious Bull Figurine

a) Try Times: 1
b) Time Spent: 6m 02s scanning / 34m 28s total workflow time
c) Scanning Notes:
Challenge ①: Large Scale and Highly Intricate Carvings
As the final object of this challenge, this dark, wood-like resin bull statue presented a test of endurance. It was quite large and heavily detailed, covered in intricate traditional Chinese coin motifs and saddle carvings. While the scanner had no trouble tracking the material, getting the light into every deep corner of the complex patterns over a larger surface area required a longer scanning duration.
Solution ①: 3-Angle Strategy and Progressive Merging
To ensure complete coverage, I scanned the figurine from three distinct angles:
1. Front + Top-down (main body).
2. An additional Top + Front sweep at a different tilt.
3. Lying on its side (to capture the flat underside of the base).
Applying the progressive merging technique I developed during the vase scan, I manually aligned Dataset 1 and Dataset 2 first, then let the software auto-align this combined dataset with Dataset 3. The strategy worked beautifully on the first attempt.
Challenge ②: Unscannable Transparent Red Gems
The bull features two shiny, transparent red gems embedded on its upper back and tail. Because these gems are translucent, the structured light passed straight through or refracted, leaving empty gaps (holes) in those areas of the raw 3D mesh.
Solution ②: Closed Solid Processing with "Repair Gaps" Enabled
Unlike the hollow vase, this bull is a completely solid figurine with no open structures that need to remain hollow. Therefore, during post-processing, I kept all processing steps enabled—including Repair Gaps (hole filling). The software automatically patched up the voids left by the transparent red gems, delivering a clean, fully enclosed solid model.
Additionally, under the monochrome texture mapping feature, the entire deep-red body of the sculpture is rendered as near-black or very dark. If you have high color-fidelity requirements and need to preserve the vibrant reds and browns of such ornaments, a full-color scanner like the 3DMakerpro Moose would be a better fit. However, for a monochrome device, Fox's performance in capturing this highly complex, dark-colored sculpture was still very capable and satisfying.
d) Takeaway:
Glossy, transparent, or translucent elements are classic obstacles for structured light 3D scanners. However, if the target object is completely solid, enabling the “Repair Gaps” (hole-filling) feature in your software is an incredibly simple and effective way to heal these voids automatically.

A Day Well Spent
Ten objects in a single day is no easy feat, but testing the 3DMakerpro Fox was an incredible experience. From matte plastics to complex metallic casings, this scanner delivered a highly capable performance for its class.
While the Fox excels as a balanced, everyday scanner, 3DMakerpro has built a wonderfully complementary ecosystem: the Seal is your go-to for tiny details, the Moose is unmatched for its 24-bit color rendering, and the Mole takes care of challenging dark surfaces.
There is an immense sense of satisfaction when you watch a physical object successfully transition into a detailed digital model, and even more so when you print it back into reality.
What have you been scanning lately? Share your stories in the comments, or attach your creations to your favorite product pages. Until next time, happy scanning!

Featured collection
Entry-levelMedium-format


AESUB Blue Scanning Spray 400 ml


