Contenido
En el vibrante mundo de los videojuegos y la animación, Pokémon ocupa un lugar preciado en los corazones de los fans de todo el mundo. Estas icónicas criaturas han trascendido sus orígenes digitales para convertirse en símbolos de nostalgia, creatividad y comunidad. Con la llegada de la tecnología de vanguardia, ahora es posible dar vida a tus Pokémon favoritos de forma tangible usando... Escáner PokémonYa seas un artista, un coleccionista o simplemente un fanático apasionado, esta guía explorará el emocionante proceso de usar un escáner 3D, como el Moose Escáner 3D, para crear representaciones físicas de estos queridos personajes.
¿Qué es el escaneo 3D?
El escaneo 3D es un proceso extraordinario que captura la forma y las dimensiones de un objeto físico y lo convierte en un modelo digital 3D. Mediante diversos métodos, como el escaneo láser, la luz estructurada o la fotogrametría, esta tecnología permite obtener detalles intrincados de los objetos. Los archivos digitales resultantes se pueden utilizar para una gran variedad de aplicaciones, como la impresión 3D, la animación y las experiencias de realidad virtual. Al comprender cómo funciona el escaneo 3D, los fans pueden descubrir la posibilidad de celebrar a sus Pokémon favoritos de formas nuevas y emocionantes, haciendo uso de... Escáner Pokémon inestimable.
Cómo elegir el escáner 3D adecuado
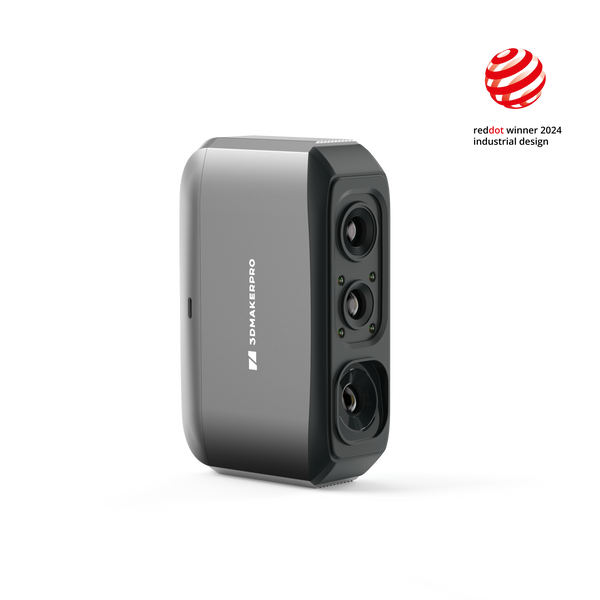
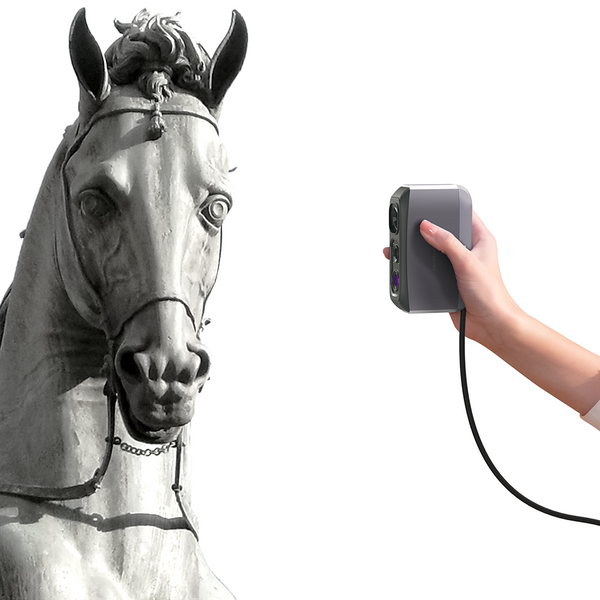
Seleccionar el escáner 3D adecuado es crucial para obtener los mejores resultados. Al elegir, tenga en cuenta varios factores clave. Moose Escáner 3D, un líder Escáner de PokémonDestaca por su impresionante precisión de 0,03 mm y resolución de 0,07 mm, lo que garantiza que incluso los detalles más finos de tus modelos Pokémon se capturen de forma impecable. Además, su diseño ligero de tan solo 280 g y sus compactas dimensiones de 115 x 70 x 35 mm lo hacen portátil y fácil de manejar. El escáner funciona a una distancia de trabajo de 150-400 mm, con un rango de escaneo típico de 15-1500 mm, lo que le otorga versatilidad para capturar diversos objetos. Por último, Software de JM Studio Es muy fácil de usar y compatible con su sistema informático, lo que agilizará su flujo de trabajo y mejorará su experiencia general con su Escáner Pokémon.

Preparación para la exploración
Antes de comenzar el proceso de escaneo, una preparación adecuada es clave para obtener resultados de alta calidad. Comienza seleccionando la figura o modelo de Pokémon que quieras replicar; cuanto más complejo sea el diseño, mejor. A continuación, prepara el entorno de escaneo: un área bien iluminada con mínimas distracciones mejorará significativamente la calidad del escaneo. Es importante evitar superficies reflectantes que puedan confundir al escáner y generar imprecisiones. Moose El modo de seguimiento visual con IA del escáner 3D te ayuda a navegar por formas complejas, lo que facilita la captura de cada detalle. Finalmente, coloca tu modelo de Pokémon sobre una superficie estable y considera usar una plataforma giratoria si la figura tiene una forma compleja, ya que esto te permitirá un escaneo más fácil y completo. Escáner Pokémon.
Proceso de escaneo
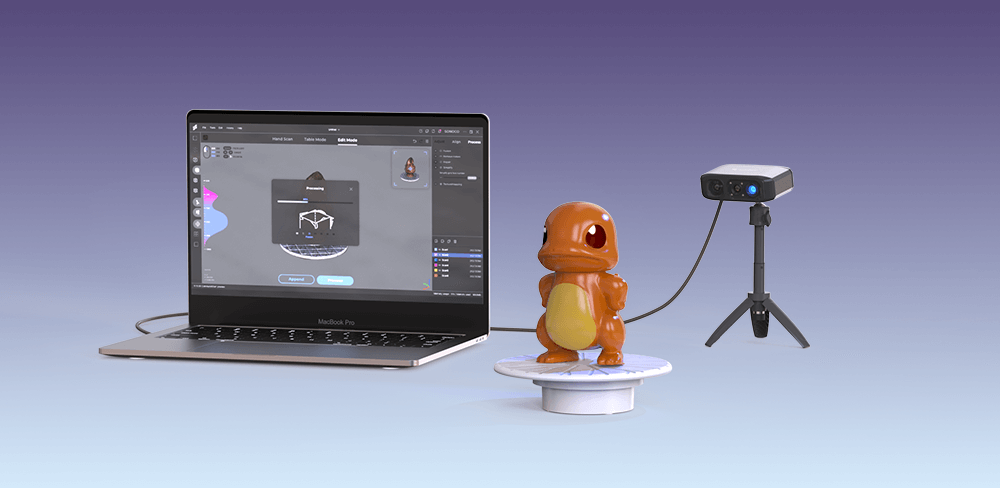
Primero, conecta tu Moose Conecta el escáner 3D a tu ordenador y coloca a tu Pokémon Charmeleon en la plataforma giratoria. Puedes dejar que gire automáticamente o hacerlo manualmente. Como el modelo es pequeño, es fácil de manipular a medida que avanzas en el escaneo.
Para el primer escaneoColoque a Charmeleon en posición vertical, girándolo una o dos veces para asegurar una cobertura completa desde arriba, frente e inferior. La pequeña llama en la cola puede ser difícil de capturar debido a la saturación del color, pero no se preocupe; escaneos posteriores pueden solucionar este problema.
Para el segundo escaneoColoque a Charmeleon boca arriba, enfocándose en su parte trasera. Ajusté el brillo para mejorar la visibilidad de la llama. Inicialmente, bajar el brillo no ayudó, pero aumentarlo reveló la llama con mayor claridad. Parece que escanear objetos rojos con el Moose El escáner 3D requiere un mayor brillo; finalmente me decidí por un ajuste de 7. Cada escaneo es un nuevo viaje, descubriendo nuevos mundos.
Para el tercer escaneoColoqué a Charmeleon en un ángulo semiinclinado para capturar las partes ocultas de la llama, el mentón y la parte delantera del pie. Planificar múltiples escaneos es esencial para capturar todo. Con la experiencia, nuestra velocidad y eficiencia de escaneo mejorarán significativamente.
Posprocesamiento del modelo
Una vez finalizado el escaneo, es hora de eliminar las partes innecesarias. Asegúrate de ocultar los demás datos del escaneo y seleccionar el conjunto de datos actual que quieres procesar; de lo contrario, tus esfuerzos podrían ser en vano. Tras eliminar todo el ruido, alinea los tres conjuntos de datos del escaneo. La función de alineación automática debería ser suficiente y, tras unos minutos, puedes continuar con el procesamiento final. Selecciona todas las opciones en la interfaz, asigna un nombre al archivo y espera unos 10 minutos. Finalmente, tendrás tu Charmeleon ideal, con colores restaurados y detalles realistas.
Impresión 3D de tu Pokémon
Con tu modelo terminado, es hora de dar vida a tu Pokémon mediante la impresión 3D. La elección de la impresora es vital; selecciona una que se adapte a tus necesidades, ya sea que prefieras impresoras FDM para modelos coloridos y duraderos o impresoras de resina para impresiones con gran detalle. La selección del material es igualmente importante: el PLA es una opción popular para principiantes debido a su facilidad de uso y variedad de colores. Mientras te preparas para la impresión, ajusta la configuración de tu impresora según la complejidad y el tamaño del modelo. Aunque los ajustes con mayor detalle pueden tardar más, ofrecen resultados superiores, asegurando que tu Pokémon se vea espectacular. Consulta el manual de tu impresora 3D para conocer los parámetros de corte recomendados; generalmente, la configuración predeterminada funciona bien.
Exhibiendo tus Pokémon
Una vez impreso tu modelo, la diversión no termina ahí; puedes personalizar y exhibir aún más tus Pokémon. Considera pintar y embellecer tu figura para que coincida con su apariencia en el juego, añadiendo un toque de creatividad a tu trabajo. Exhibe tu obra maestra en una estantería, incorpórala a un diorama o úsala como una pieza única de juego para impresionar a tus amigos y otros fans. Las posibilidades son infinitas, y mostrar tus creaciones no solo celebra tu amor por Pokémon, sino que también inspira a otros miembros de la comunidad a explorar sus propias creaciones artísticas.
En conclusión, el escaneo 3D abre un mundo de posibilidades para los fanáticos de Pokémon, permitiéndoles crear y personalizar sus propias figuras de maneras que antes se creían imposibles. Moose Escáner 3D, un excelente Escáner de Pokémon Con su excepcional precisión y funciones intuitivas, mejora esta experiencia creativa. Con un poco de práctica, creatividad y las herramientas adecuadas, puedes transformar tus personajes digitales favoritos en obras de arte tangibles que atesorarás para siempre. ¡Así que toma tu...! Moose Escáner 3D, elige tu Pokémon y ¡emprende un emocionante viaje de creación y descubrimiento!

Colección destacada
Medium-format


Medium-format


